


Cream puffs are one of those delightful desserts that evoke feelings of warmth, comfort, and nostalgia. If you’ve ever had the chance to enjoy Mom’s Famous Cream Puffs, then you know exactly what we’re talking about. These airy, light, and perfectly sweet treats are a favorite in many households. But what makes them so special? The answer lies in their simplicity, technique, and that little extra love that only a mother can add.
In this article, we’ll explore everything you need to know about Mom’s Famous Cream Puffs: from their origin, ingredients, techniques, and tips for achieving perfection every time. Plus, we’ll share the secret that has made this recipe a beloved classic.
The History of Cream Puffs
Cream puffs, or choux pastry, are believed to have originated in France in the 16th century. The dough, known as pâte à choux, was first developed by a chef of Catherine de Medici. Over the centuries, the recipe has been refined and adapted by chefs across Europe, leading to the delicious dessert we know today. Cream puffs became especially popular in French bakeries, where they were often filled with custards, creams, or ice cream, and dusted with powdered sugar.

While France may be the birthplace of cream puffs, the treat has found a home in kitchens all over the world. In the United States, cream puffs are often featured at state fairs and special family gatherings, and of course, passed down from generation to generation, as seen with Mom’s Famous Cream Puffs.
What Makes Mom’s Cream Puffs So Special?
The magic of Mom’s Famous Cream Puffs lies in their perfect combination of textures and flavors. The outside is golden and crispy, while the inside is soft and airy, filled with a luscious, creamy filling that melts in your mouth. These cream puffs strike the perfect balance between light and rich, sweet and savory.
So, what sets them apart? Here are a few reasons why they are such a hit:
- Simple Ingredients, Maximum Flavor: Mom’s recipe doesn’t rely on any fancy or hard-to-find ingredients. It’s all about classic staples: butter, flour, eggs, and cream. The beauty of this dessert is how such basic ingredients can create something so decadent.
- Perfect Technique: While the ingredient list may be simple, the technique is where the magic happens. The dough requires just the right amount of cooking and mixing to achieve that signature puff.
- The Love Factor: Every family recipe has that one secret ingredient that can’t be bought or measured. In Mom’s case, it’s the love and care that go into every step of the process. When you’re making these for loved ones, you’ll find that they taste even better.
Step-by-Step Process to Create the Perfect Cream Puff
Making cream puffs from scratch may seem daunting, but with the right guidance and patience, anyone can master it. Here’s a detailed step-by-step process to ensure your cream puffs turn out perfectly every time.

1. Preparing the Choux Pastry
The foundation of a perfect cream puff is the choux pastry. This dough is different from most other pastry doughs because it’s cooked before baking. Follow these steps carefully to create the perfect puff:
- Ingredients for Choux Pastry:
- 1 cup of water
- 1/2 cup unsalted butter
- 1 cup all-purpose flour
- 4 large eggs
- A pinch of salt
- Instructions:
- Preheat your oven to 425°F (220°C).
- In a medium saucepan, combine water, butter, and salt over medium heat. Bring the mixture to a boil.
- Once the butter has melted, add all the flour at once and stir vigorously with a wooden spoon. The dough will come together into a ball and pull away from the sides of the pan.
- Cook for another 1-2 minutes to dry out the dough slightly.
- Remove the dough from heat and let it cool for about 5 minutes.
- Beat in the eggs one at a time, ensuring each egg is fully incorporated before adding the next. The dough should become smooth, shiny, and thick.
2. Shaping and Baking the Cream Puffs
- Shaping the Dough:
- Line a baking sheet with parchment paper.
- Using a piping bag fitted with a large round tip (or just a spoon if you prefer), pipe small rounds of dough onto the parchment paper, leaving enough space between each puff for them to expand.
- Lightly dampen your fingertips with water and smooth out any peaks on top of the dough.
- Baking Instructions:
- Place the baking sheet in the preheated oven.
- Bake at 425°F for 10 minutes, then reduce the heat to 375°F (190°C) and continue baking for an additional 20-25 minutes, until the puffs are golden brown and hollow on the inside.
- Turn off the oven, open the oven door slightly, and let the puffs cool in the oven for about 10 minutes. This helps prevent them from collapsing as they cool.
3. Preparing the Cream Filling
The filling is where the real magic happens. Traditionally, cream puffs are filled with sweetened whipped cream or a rich pastry cream. Here’s how to make both options:
- Option 1: Whipped Cream Filling:
- 1 cup heavy cream
- 2 tablespoons powdered sugar
- 1 teaspoon vanilla extract
- Instructions:
- In a chilled bowl, whip the heavy cream until soft peaks form.
- Add powdered sugar and vanilla extract, and continue whipping until stiff peaks form.
- Transfer the whipped cream to a piping bag and refrigerate until ready to use.
- Option 2: Pastry Cream Filling:
- 2 cups whole milk
- 1/2 cup sugar
- 1/4 cup cornstarch
- 4 large egg yolks
- 1 teaspoon vanilla extract
- 2 tablespoons unsalted butter
- Instructions:
- In a medium saucepan, heat the milk until just simmering.
- In a separate bowl, whisk together sugar, cornstarch, and egg yolks.
- Slowly pour the hot milk into the egg mixture, whisking constantly to avoid scrambling the eggs.
- Return the mixture to the saucepan and cook over medium heat, stirring constantly, until thickened (about 3-5 minutes).
- Remove from heat and stir in vanilla extract and butter. Let it cool completely before using.
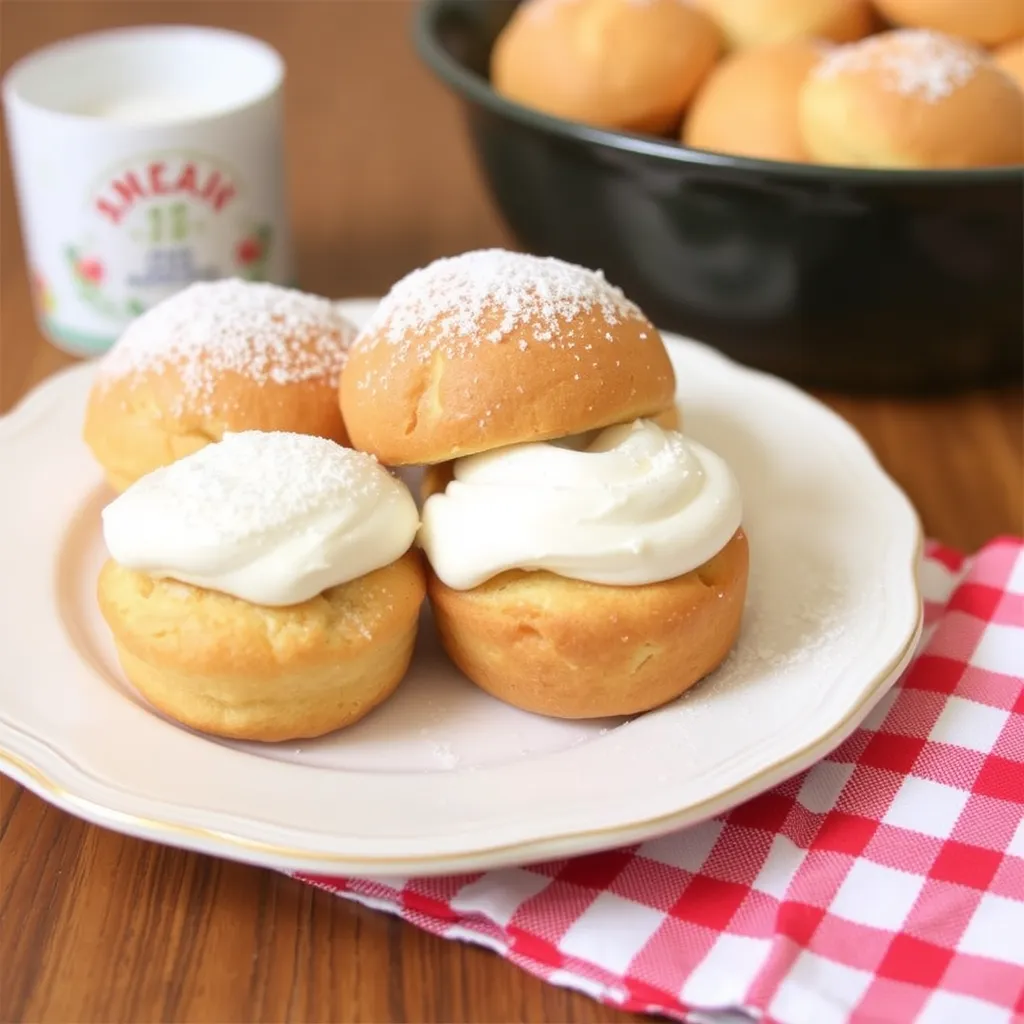
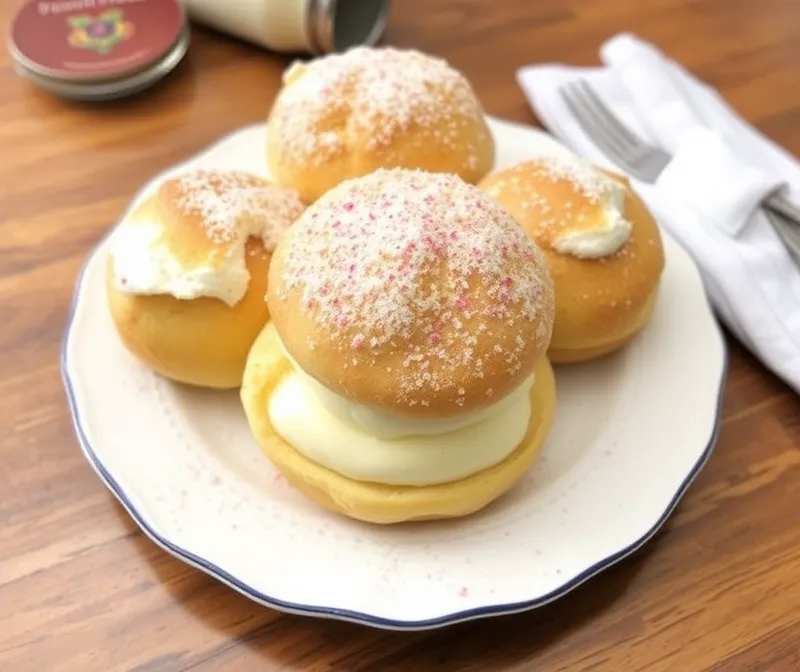
4. Assembling the Cream Puffs
Once your puffs are cool and your filling is ready, it’s time to assemble!
- Using a small sharp knife, gently cut a slit into the side or bottom of each puff.
- Pipe your chosen filling into each puff until it’s full.
- For a more dramatic presentation, you can cut the top off each puff, pipe the filling into the bottom half, and replace the top like a lid.
Tips for the Perfect Cream Puffs Every Time
- Consistency of the Dough: When making choux pastry, the dough should be thick enough to hold its shape but soft enough to pipe. If it’s too stiff, your puffs won’t rise properly; if it’s too loose, they may collapse or spread too much.
- Temperature Control: The initial high heat causes the puffs to rise quickly and form a crust. Lowering the temperature partway through baking allows them to cook fully without burning.
- Don’t Open the Oven: Opening the oven door too soon can cause your puffs to deflate. Wait until they are golden brown and crisp before checking on them.
- Dry Out the Puffs: Letting the puffs sit in the turned-off oven with the door slightly open helps them dry out and hold their shape.
- Chill the Filling: Whether you’re using whipped cream or pastry cream, make sure it’s chilled before filling the puffs. This helps the filling stay firm and the puffs remain crisp.
Variations on the Classic Cream Puff
Once you’ve mastered Mom’s Famous Cream Puffs, there are plenty of ways to mix things up and create your own variations. Here are a few ideas:
- Chocolate Cream Puffs: Add a layer of melted chocolate or chocolate ganache on top for a rich twist.
- Fruit-Filled Cream Puffs: Fold fresh fruit, like strawberries or raspberries, into the whipped cream filling for a refreshing burst of flavor.
- Savory Cream Puffs: Skip the sugar and fill your puffs with a savory filling, like herbed cream cheese or smoked salmon mousse, for an elegant appetizer.
Frequently Asked Questions
Q: Can I make the cream puffs ahead of time?
A: Yes! You can make the puffs a day ahead. Store them in an airtight container at room temperature. Fill them with cream just before serving to prevent them from becoming soggy.
Q: Can I freeze cream puffs?
A: Absolutely! You can freeze unfilled cream puffs for up to two months. Let them cool completely before freezing, and reheat in the oven before filling.
Q: How do I prevent my cream puffs from collapsing?
A: Be sure to bake them long enough so that they are crisp and golden. Letting them cool