


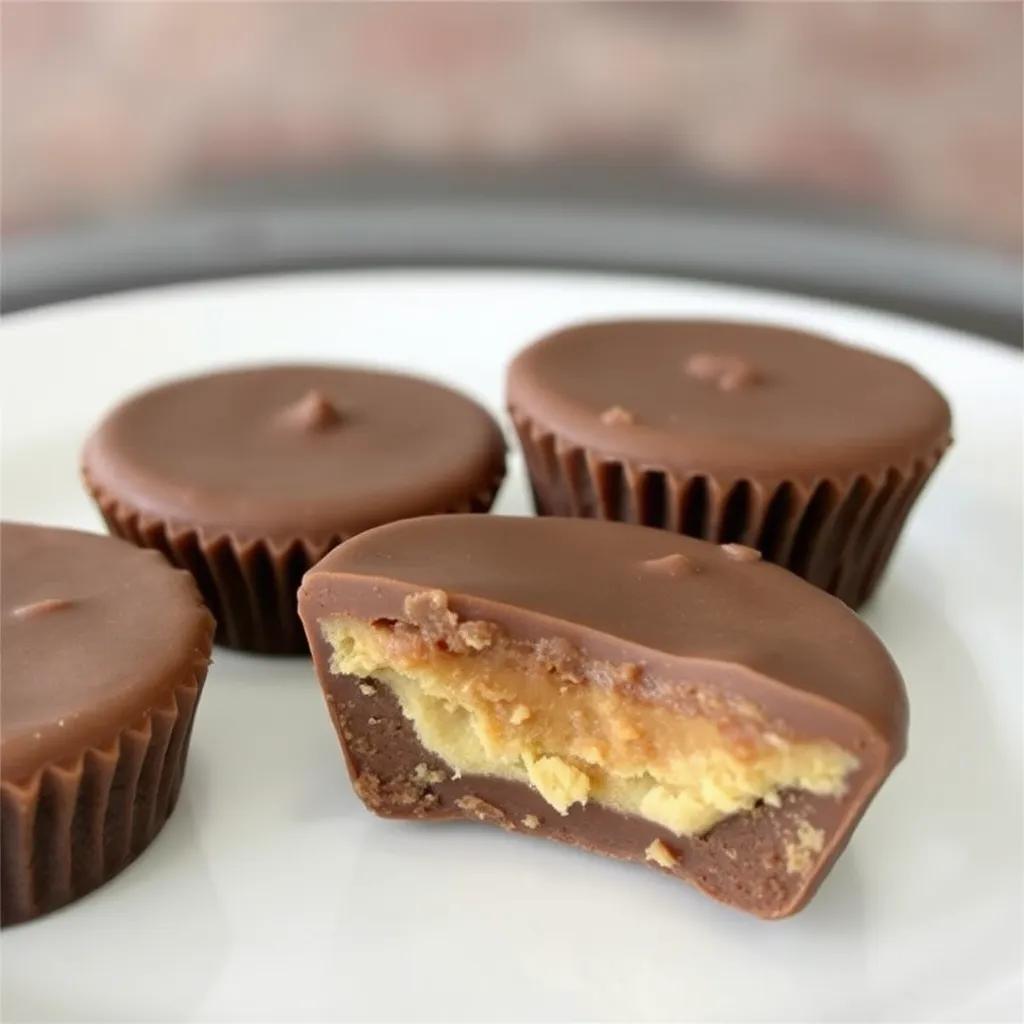
Imagine sinking your teeth into a perfect combination of rich chocolate and creamy peanut butter—it’s the iconic taste of Reese’s Peanut Butter Cups. But what if you could recreate that mouthwatering delight in your own kitchen? With a few simple ingredients and some easy steps, you can enjoy homemade Reese’s Peanut Butter Cups that taste even better than the store-bought ones.
In this article, we will guide you through everything you need to know to make these delicious treats at home, from the ingredients and tools you’ll need to step-by-step instructions and tips for perfecting your recipe. So, get ready to impress your friends and family with homemade Reese’s Peanut Butter Cups that will leave them craving more!
Why Make Homemade Reese’s Peanut Butter Cups?
Making homemade Reese’s Peanut Butter Cups isn’t just about saving money or knowing exactly what goes into your treats. It’s about crafting something special, creating a version that suits your taste perfectly. When you make them yourself, you have full control over the quality of the ingredients, the size of the cups, and even the flavor combinations. Plus, it’s a fun kitchen project that can be done with friends, family, or even on your own as a relaxing activity.
Homemade peanut butter cups also make fantastic gifts for holidays, birthdays, or any special occasion. Wrapped in a little box or placed in decorative tins, they can be a sweet, personal gift that shows you care. Not to mention, these homemade treats can be customized to fit dietary restrictions, such as using sugar-free chocolate or gluten-free ingredients.
Ingredients Needed for Homemade Reese’s Peanut Butter Cups
Creating homemade Reese’s Peanut Butter Cups requires just a handful of ingredients, many of which you might already have in your pantry. Here is the list of ingredients you will need:
- Chocolate: Choose a high-quality chocolate for the best taste. Milk chocolate will give you that classic Reese’s flavor, but you can also opt for dark chocolate if you prefer a richer taste or want to make a slightly healthier version.
- Peanut Butter: Creamy peanut butter works best to replicate the smooth texture of the original, but crunchy peanut butter can be used if you want added texture.
- Powdered Sugar: This helps to thicken the peanut butter filling and adds the necessary sweetness.
- Butter: A small amount of butter (unsalted) is used to achieve the right consistency in the peanut butter mixture.
- Salt: A pinch of salt enhances the flavors, particularly in the peanut butter mixture.
- Vanilla Extract: A touch of vanilla extract can elevate the flavor of your homemade Reese’s Peanut Butter Cups, adding a subtle depth.
Tools You’ll Need to Make Homemade Reese’s Peanut Butter Cups
To make your homemade Reese’s Peanut Butter Cups, you won’t need any fancy equipment. Here are the basic tools that will make the process easier:
- Muffin Tin: A standard-sized muffin tin works great for making regular-sized peanut butter cups. For mini cups, use a mini muffin tin.
- Cupcake Liners: Paper cupcake liners help shape the cups and make them easy to remove from the tin.
- Mixing Bowls: A couple of mixing bowls will be needed to prepare the chocolate and peanut butter mixtures.
- Microwave or Double Boiler: You’ll need a microwave or a double boiler to melt the chocolate.
- Spoon or Spatula: For mixing ingredients and spreading chocolate.
- Refrigerator or Freezer: To help the cups set quickly.
Step-by-Step Guide to Making Homemade Reese’s Peanut Butter Cups

Step 1: Prepare the Muffin Tin
Line a muffin tin with paper cupcake liners. This will give your peanut butter cups their shape and make them easy to remove once they’re set. You can use a standard muffin tin for regular-sized cups or a mini muffin tin for bite-sized treats.
Step 2: Melt the Chocolate
Place the chocolate in a microwave-safe bowl and melt it in the microwave in 30-second intervals, stirring between each interval to ensure the chocolate doesn’t burn. Alternatively, you can use a double boiler to melt the chocolate slowly and evenly. Once melted, stir the chocolate until it is smooth and glossy.
Step 3: Make the Peanut Butter Filling
In a separate bowl, mix the peanut butter, powdered sugar, melted butter, vanilla extract, and a pinch of salt until smooth. The mixture should be thick but spreadable. Adjust the consistency by adding more powdered sugar if necessary.
Step 4: Assemble the Peanut Butter Cups
Spoon a small amount of melted chocolate into the bottom of each cupcake liner, spreading it out to create an even layer. Place the muffin tin in the refrigerator for about 10 minutes to allow the chocolate to set slightly.
Once the bottom layer of chocolate has set, add a small spoonful of the peanut butter mixture to the center of each cup. Gently flatten it, but make sure to leave some space around the edges for the chocolate to encase the filling completely.
Pour more melted chocolate over the peanut butter filling until it is completely covered. Tap the tin gently on the counter to smooth out the chocolate and eliminate any air bubbles.
Step 5: Let the Cups Set
Place the muffin tin in the refrigerator or freezer until the chocolate is completely set. This should take about 20-30 minutes in the refrigerator or 10-15 minutes in the freezer.
Step 6: Enjoy Your Homemade Reese’s Peanut Butter Cups
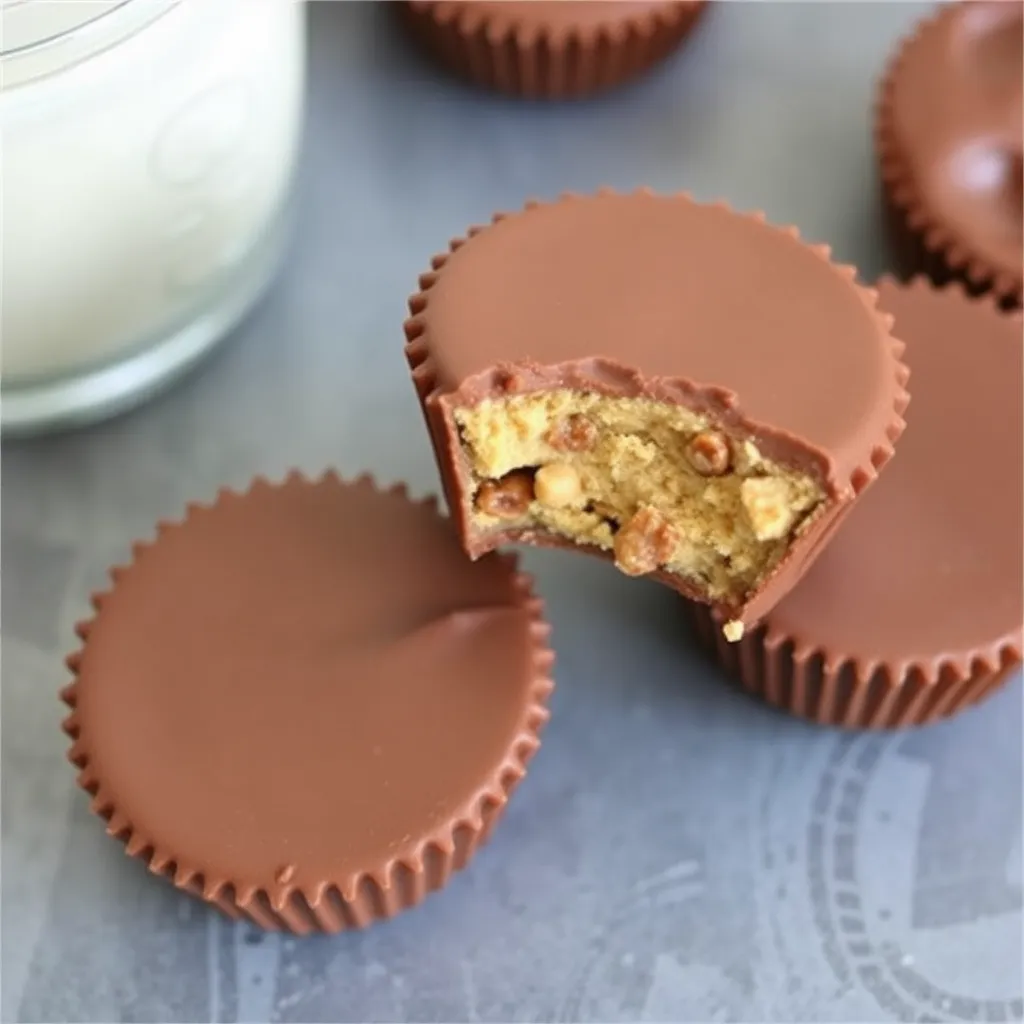
Once set, remove the peanut butter cups from the muffin tin and peel away the paper liners. Your homemade Reese’s Peanut Butter Cups are now ready to enjoy! Store them in an airtight container at room temperature or in the refrigerator for a firmer texture.
Tips for Perfect Homemade Reese’s Peanut Butter Cups
- Choose High-Quality Chocolate: The taste of your homemade peanut butter cups largely depends on the quality of the chocolate. Opt for a brand you enjoy eating on its own.
- Use Fresh Peanut Butter: Natural, unsweetened peanut butter can be used for a healthier option, but make sure to stir it well to prevent separation.
- Customize to Your Taste: Feel free to experiment with different types of chocolate, such as white chocolate or dark chocolate. You can also add a sprinkle of sea salt on top for a gourmet touch.
- Storage Tips: If you’re not planning to eat all of the peanut butter cups right away, store them in a cool, dry place. They can last up to two weeks in the refrigerator or even longer in the freezer.
Common Mistakes to Avoid When Making Peanut Butter Cups
- Overheating the Chocolate: Chocolate can easily burn if overheated. Always melt chocolate slowly and stir frequently to avoid scorching.
- Using a Runny Peanut Butter Filling: If the peanut butter mixture is too runny, it will not hold its shape well. Make sure it is thick and not overly sticky.
- Skipping the Cooling Steps: Letting each layer of chocolate set before adding the next layer ensures a clean and uniform look. Don’t rush this process.
Healthier Alternatives for Homemade Reese’s Peanut Butter Cups
If you want to make your homemade Reese’s Peanut Butter Cups a little healthier, consider the following swaps:
- Dark Chocolate: Use dark chocolate with a high cocoa content to reduce sugar.
- Natural Peanut Butter: Choose peanut butter with no added sugars or oils.
- Sugar Substitutes: Replace powdered sugar with a sugar substitute like stevia or erythritol.
FAQs
Can I use almond butter instead of peanut butter?
Yes, almond butter or any other nut butter can be substituted for peanut butter. This can change the flavor profile slightly but will still yield delicious results.
How long do homemade Reese’s Peanut Butter Cups last?
When stored in an airtight container, they can last up to two weeks in the refrigerator and even longer in the freezer.
Can I add mix-ins to the peanut butter filling?
Absolutely! You can add ingredients like crushed pretzels, chopped nuts, or mini chocolate chips for added texture and flavor.
What if I don’t have a muffin tin?
You can use silicone molds or even ice cube trays as an alternative, although the shape might be a bit different.
Can I make these peanut butter cups vegan?
Yes, use dairy-free chocolate and a plant-based butter alternative to make a vegan version.
What if my chocolate is too thick to pour?
If your chocolate becomes too thick, you can add a small amount of coconut oil to thin it out and make it easier to pour.
Conclusion
Making homemade Reese’s Peanut Butter Cups is not only a delightful experience but also a chance to indulge in a classic treat made just the way you like it. Whether you stick to the original recipe or put your own twist on it, these peanut butter cups are sure to become a favorite in your household. So grab your ingredients, roll up your sleeves, and start making some delicious homemade treats today!